Monday, December 30, 2013

Asian Slaw

It's a glooooooomy day here. Cold and gloomy. My poor boy just wants to spend hours outside, but after about 10 minutes he's ready to come in and starts with the restlessness again. Endless loop.

I will be 36 weeks tomorrow....so we are down to the 'any day now' section of life. The dresser is together, baby clothes are being washed and organized and the bassinet has been purchased...just needs to be assembled. I am so ready in the physical sense, I am uncomfortable, but mentally not prepared for what the near future holds. I really cannot wait to meet our new little boy though. Our sweet Luke.

Now onto the food...what you really came over to my neck of the woods for.

This is an easy side dish and could be amped up with some peanuts for a protein punch. We had it along with the Pinto Bean salad and Quinoa Noodle Salad.

Again....a crappy picture....sorry!


Asian Slaw


3 tablespoons seasoned rice vinegar
2 tablespoons toasted sesame oil
1 1/2 tablespoons soy sauce
Hot sauce to taste
1 bag shredded coleslaw mix...I did the kind with purple cabbage, green cabbage and carrots
3 to 4 green onions, sliced, white and green parts


Whisk together rice vinegar, sesame oil, soy sauce and hot sauce in a small bowl. 

Toss in a large bowl with coleslaw mix and green onions. 

Chill for about an hour to meld flavors. Give a toss before serving. 


Dig in!!


Sunday, December 29, 2013

Pinto Bean Salad with Maple and Mustard Dressing

Ah...we got a new camera. A Nikon Coolpix. LOVE IT. So many more settings than our old Sony. But, unfortunately, we didn't have it in time for my next 3 blog recipe entries....so please don't judge the recipe by the picture...they are all 3 delicious.

We had a cold salad supper the other night. It's still pretty warm most of the time in Florida...and humid. Very, very humid.

We made 3 different ones, a quinoa noodle salad, an Asian coleslaw and this pinto bean one. I've been making this one for a few years now and it's always a hit. It's a good one to just have in the fridge to have with lunch or as a last minute side with dinner. It's actually hearty enough to be the main dish. It's good served over salad greens as well.

Anyway....here it is, I hope you enjoy it as much as we do!


Pinto Bean Salad with Maple Mustard Dressing

1 3/4 cups cooked pinto beans (about a cans worth), rinsed and drained if using canned
1 1/2 cups frozen corn kernels, thawed
1/2 cup diced, roasted bell pepper (I usually use red, but used a combo of red and green this time)
3 or 4 green onions, sliced (green and white parts)

Dressing:
1/4 cup soy sauce
2 tablespoons Dijon mustard
2 tablespoons maple syrup
1 lemon's worth juice, 2 to 4 tablespoons

Whisk together dressing ingredients, set aside.

In a large bowl, toss all ingredents. Chill in refrigerator for at least an hour to really let flavors combine. 


Dig in!!

Friday, December 27, 2013

Slow Cooker Savory Breakfast Casserole

Ah...Christmas is over. Breath a sigh of relief. It was exhausting this year!

Cooper had so much fun, but little ones get too excited to do things like..eat...so they get grumpy. We had our fair share of melt downs during the holiday. Our living room is still littered with Christmas gifts, I am putting off the organizing new toy stuff....

But look at this face....


My parents got him a bike.....he loves it. He refuses to wear his helmet so we won't let him ride it outside yet. 

We had about 12 people over for Christmas brunch. This year I did all slow cooker recipes, which was SO easy. I woke up at 5AM to get everything going and it worked out great. I was hoping to share all of the recipes with you....but our digital camera died a week before Christmas and we have yet to buy a new one. Kevin's tablet takes pictures, but they didn't turn out too well. We did get one good picture...for the recipe I am sharing below. 

We used vegetarian sausage patties and no one knew the difference!


Slow Cooker Savory Breakfast Casserole

6 eggs, beaten
1 pound bulk sausage, browned or 1 box vegetarian sausage patties, thawed and chopped up
1 1/2 cups milk
1 cup shredded cheddar
8 slices bread, torn into pieces or 1/2 a loaf of French bread, torn into pieces
1 teaspoon salt
1/2 teaspoon dry mustard
1 cup shredded mozzarella

Mix all ingredients together except mozzarella, pour into a greased slow cooker. 

Sprinkle mozzarella over top. 

Cover and cook on high for 2 hours and then 1 hour on low. 


Dig in!!!


Sunday, December 15, 2013

Blueberry Streusel Cornbread

Tonight....I am going to share the recipe for this delicous Blueberry Streusel Cornbread...but first....a recap on the weekend.


We went to our downtown area last night and saw the lights. They do a great display for children to run and play through in a park. 


Yes...the rest of the country is freezing and we are here in Central Florida running around in shorts looking at Christmas lights. 

We stopped for a dinner outside at Jimmy John's. Cooper ate about 5 bites of a ridiculously large Tuna Sandwich...he felt pretty big holding this. 


We also got Squeak  new tankmate....her name is Pippy. She's very skiddish still, but she'll come around. I opened a can of soda near them this morning and she ran like the world was ending....


OK, so onto the cornbread....

I was flipping through a copy of Fix it and Forget it and Enjoy it....and saw this recipe. I made it go along with the Cowboy Casserole from 2 posts ago. WELL....we ate it after because I neglected to look at how long it would take to bake before planning out timing for everything. BUT...it was still really good. It's interesting because while you could eat it as a side dish for dinner, it does have the sweet streusel topping..so it's sort of desserty too. I used frozen blueberries, but you can use fresh or frozen. If you use frozen, make sure they are thawed and drained before mixing them in. 


Blueberry Streusel Cornbread

2 packages(envelope sized) cornbread mix
2 eggs
2/3 cup milk
2 tablespoons flour
2 cups fresh or frozen blueberries, thawed and drained if frozen

Streusel Topping:
3 tablespoons butter, softened
3/4 cup sugar
1/2 cup flour
3/4 teaspoon cinnamon

Preheat oven to 350. 

Mix corn muffin mix, eggs milk and flour until combined. Fold in blueberries and pour into a greased 9x9 baking pan. 

In a small bowl, combine streusel ingredients until mixed into fine crumbs. Use a pastry cutter or fork. Sprinkle over cornbread. 

Bake at 350 for 45 to 50 minutes, until a toothpick inserted in the middle comes out clean. Serve warm. 


Dig in!


Thursday, December 12, 2013

Slow Cooker Chocolate Lava Cake

The Sweet Tooth has hit.....I want cake most days. Or chocolate. Or ice cream. Or ALL of them....

But...I don't want to turn on the oven. This cake was perfect for that. Cake and chocolate...one pot....easy.

It was really good served with vanilla ice cream, but would also be fantastic with some fresh whipped cream...or cool whip if that's your thing.


Slow Cooker Chocolate Lava Cake

1 box chocolate cake mix
1 2/3 cups water
3 eggs
1/3 cup canola or vegetable oil
2 cups cold milk (I used 1 %)
1 box instant chocolate pudding mix
2 cups...1 bag...semisweet chocolate chips


Spray 4 or 5 quart slow cooker with cooking spray. 

In a large bowl, combine cake mix, water eggs and oil with a mixer until well blended. Pour into slow cooker. 

Rinse bowl or use another mixing bowl and whisk milk and pudding mix for 2 minutes. Let stand until slightly set, about 2 minutes. Spoon over cake batter and sprinkle with chocolate chips. 

Cover and cook on high for 3 to 4 or low for 5 to 6 hours, until toothpick inserted into cake part comes out with soft crumbs. Serve warm. 


Dig in!

Tuesday, December 10, 2013

Minnie's Cowboy Camper Skillet Dinner

Florida in December makes it a little hard to get into the Christmas Spirit. It's hot. Our tree isn't even up yet. I am having a super unmotivated year, I need to snap out of this funk....

The tree will go up this weekend and I will start wrapping presents, no waiting until 2 days before Christmas this year.

Cooper is really excited about Christmas this year and keeps asking me when Christmas is. He was even excited to see Santa this year, no tears!!


WELL...hopefully it starts cooling off soon. I know I have no room to whine when most of the North is currently covered in ice and snow.


Today's recipe is another one brought to you by my mother in law. Along with Anamosa Squash and Creamy Chicken and Noodles(which is ALWAYS my top pinned and viewed post). This recipe is something her mother used to cook on the farm. They ate a lot of potatoes, mainly plain but sometimes with kale and sometimes in this casserole below. We were trying to figure out what to cook this week and this sprang to her mind. I made it last night and it was SO GOOD. Very basic, very easy and very filling. Also...super cheap!

I used red potatoes because it was what I had on hand, but you could use any potato you want. Also, her mother used to use canned pork and beans, I used vegetarian. I also added the fried onions, they were not in the original 1940's version.


Minnie's Cowboy Camper Skillet Dinner

1 1/2 - 2 pounds potatoes, any kind. Peel and cube or leave skins on if using red. 
1 medium onion, diced
1 large can baked beans, vegetarian or pork and beans
1 cup ketchup
A couple splashes of Worcestershire sauce
Fried onions for garnish (optional)


Boil potatoes in salted water until tender, drain. 

Meanwhile, heat a little olive oil in a large skillet and cook onion until just starting to get tender. Add cubed potatoes and continue cooking until potatoes start to brown and crisp a bit. 

Mix in ketchup and Worcestershire sauce. 

Poor over beans and heat through!

Garnish with fried onions, if desired. Serve hot!


Dig in!

Sunday, December 8, 2013

Anamosa Squash

One of the lovely things that comes along with your mother and sister in law living with you....is not having to cook dinner EVERY night and getting to try other people's cooking. Both are great cooks and this dish below has been my FAVORITE so far....

They both went to a tea room/antique shop with a gypsy type feel a few years ago in Anamosa, Iowa and had this dish. The owner shared the recipe with them....luckily for us. Unfortunately, the shop is now closed. But the dish lives on....

We make ours with vegetarian sausage, but I'll share the measurements for meat eaters and vegetarians below.


I am also including a video under the recipe on how to cut an acorn squash if you need a little guidance.


Anamosa Squash

4 small or 2 large acorn squash
Olive oil
Salt and pepper
1 pound ground sausage or 1 box of Morning Star Farms or other vegetarian sausage patty or link(thawed)
8 ounces cream cheese, softened
1 teaspoon or to taste Worcestershire sauce

Preheat oven to 425. 

Cut squash in half and scoop out the seeds. Line baking sheet with foil and brush with a little olive oil. Brush cut sides of squash with olive oil and sprinkle with salt and pepper. Place cut sides down and roast for 30 to 45 minutes, until tender. 

Meanwhile, brown sausage in skillet if using real sausage. Or cut up vegetarian sausage into small pieces (crumbly) and heat in skillet. 

Whip cream cheese with Worcestershire sauce and stir in sausage, while still warm. 

While still warm, divide into cooked squash and serve right away. 


Dig in!

This is SO GOOD. 


Tuesday, December 3, 2013

Black Bean Fajita Casserole

WELL....I am 32 weeks pregnant today....32 weeks.


Time is flying! At the most, I have about 7 weeks left. I am having a scheduled cesarean this time around and they typically deliver you about a week before your due date. This boy is active and I feel like he's trying to break out already.

Our current family on Thanksgiving.


Alright..onto today's recipe!

I did a post a few days ago on cooking peppers and onions in the slow cooker, it's time to put those to good use. 

Back when we were all meat eaters, I did one of those foiled chicken pack campfire oven whatever you call ems....got it? Anyway, it had rice, taco seasoning, chicken, salsa, peppers and onions all wrapped in foil and baked. Was pretty good. It's one of those meat dishes I miss. I decided to make a vegetarian version and we were all very pleased!

This is an easy recipe, but you have to allow time before assembling to precook your rice, peppers and onions. 


Black Bean Fajita Casserole

1 1/2 cups uncooked rice (I used brown)
3 cups water
1 tablespoon taco seasoning
2 small or 1 medium bell pepper(s), cut into strips
1 medium onion, cut into strips
Fajita seasoning to taste
1 can black beans, drained and rinsed
1 1/2 cups frozen corn kernels
1 1/2 cups salsa or picante sauce
2 cups shredded Fiesta or Mexican blend cheese
Sour cream 


Prepare rice according to package directions with taco seasoning mixed in. 

Meanwhile, saute peppers and onions with fajita seasoning until tender, or cook using slow cooker method. Dice when cooked and cooled a bit or leave in strips. 

Preheat oven to 350. Grease/use pan spray in a 13x9 pan. 

Spread cooked rice over bottom of pan. Evenly distribute black beans, corn, peppers and onions over rice. Spoon salsa over top. Sprinkle with a bit more fajita seasoning, if desired. Top with shredded cheese. Bake at 350 for 25 minutes, until cheese has melted and it's heated through. 

Serve with sour cream and more salsa if desired. 


Dig in!!!


Monday, December 2, 2013

Peppers and Onions in the Slow Cooker

Ahh...still full from Thanksgiving?

Finally feeling a little hungry over here....

I hope my American friends had a happy Thanksgiving! We did. We celebrated 2 days...Thursday at my Dad's and Friday at my Grandma's. Yum yum....

My dad had an AMAZING garden this year and we left with a bag full of cherry tomatoes, broccoli and bell peppers. I needed to find something to do with all of the peppers so I came up with a fajita casserole that I will share in a post later this week. The casserole required sauteed peppers and onions, which I love to eat...but hate cooking. My mind got all creative remembered how EASY it is to cook onions in the slow cooker, I shared it in another post. WELL...I decided to give it a try with peppers and onions, the result was great!

I cooked mine with some fajita seasoning for the casserole, you could do the same for actual fajitas or for the casserole I'll share later. Or leave it out and use them however you like...

This is one of those no exact measurement recipes, you can make as little or as much as you need.


I used my small slow cooker for this one, but it would work in a larger one too.

Cut up your bell peppers and onions into strips and place in the slow cooker. Dot the top with butter and fajita seasoning, if using. Turn on low. Stir every hour to 1 1/2 hour and dot with a little more butter if they star to brown too much around the edges. They take about 3 to 4 hours total. 

So easy....easy clean up...yummy stuff. 


Dig in!!

Tuesday, November 12, 2013

Taco Cornbread Casserole

What a busy few weeks we have had!

We found out our baby is going to be a boy! We are naming him Luke Christopher and we are counting down to his arrival. About 10 more weeks! Still so much to do....

My mother in law and sister in law moved to Florida over the weekend so we were busy getting ready for their arrival. They are staying with us for a bit, it will be a big help when Luke arrives!

On to today's recipe....

I have been making this for a few years now...I've made it vegetarian and with ground chicken. This time I used Fantastic Food's Taco 'Meat'. It's a super easy one dish meal that's great by itself or served with a side dish or salad. I made a creamy rice dish that I'll share on another post.


Taco Cornbread Casserole

1 tablespoon taco seasoning
2/3 cup water
3/4 cup shredded cheddar or Mexican blend cheese
14 oz can creamed corn
1 pound taco filling of choice....vegetarian or meat
12 ozs total of jalepeno or Mexican cornbread mix ( I used 2 six ounce envelopes of Martha White Mexican Style)
Eggs and other ingredients cornbread mix calls for
Sour cream for garnish

Preaheat oven to cornbread package directions. 

Lightly grease a 9x9 square baking dish. 

Heat water, vegetarian crumbles or meat and taco seasoning in a skillet. Heat until water evaporates. 

Mix cornbread according to package directions. Add corn. 

Place half of cornbread on bottom of pan. Add taco mix to top. Sprinkle cheddar over taco mix. Top with remaining batter. Bake according to package directions. (I had to add about 5 more minutes to mine).

Let cool for 5 minutes before serving. 

Serve with sour cream. 

Dig in!

Monday, October 14, 2013

Spaghetti Baskets

Earlier today, I came across a picture on the internet that intrigued my pregnant taste buds...


I pinned it on pinterest here. A pressed spaghetti sandwich with garlic bread. Oh yum. I started thinking about ways to recreate and dress it up a bit at home. We don't have a sandwich press so I thought a grilled cheese style with provolone and spaghetti. But...I honestly totally dislike making grilled cheese. I know they are one of the most simple foods in the world, but I really dislike the smell of hot butter in the frying pan. 

So my mind drifted to recipes I've tried in the past, like the BBQ Chicken Biscuits. It's fun to bake things in a  giant muffin pan on top of a biscuit. And yummy. My mind created these yummy Spaghetti Baskets and I went with it! They were a big hit and will go into regular meal rotation now...


First, you cook angel hair noodles according to package directions and mix with your favorite sauce and season the way you seem fit. I did a box of whole wheat spaghetti and a jar of Classico 4 Cheese sauce. I didn't season mine up too much because I was using garlic on the crescents. But your choice. 

NEXT...preheat oven to 350 and melt about 2 to 3 tablespoons of butter and mix in a few dashes of garlic powder. Meanwhile, divide crescent rolls into triangles and press into large muffin pan creating the baskets. I used 2 triangles just to fill in gaps and build up the sides. 


Next, use a pastry or bbq brush to brush down the sides and bottoms of the crescent baskets with the melted garlic butter. Place a square of mozzarella cheese or a tablespoon of shredded mozzarella to the bottom of each basket. Then place about half a cup of spaghetti in each basket. I used a big serving fork and spoon to twist the spaghetti in a nice little nest before putting them in the crescents. 


I then added a few strips of cheese to the tops, but you could do shredded if that's what you have on hand. 


Now bake at 350 for 20 minutes. Let cool for about 5 minutes before popping out of the pans. So good...we had ours with a salad. I wanted to keep eating and eating...


Spaghetti Baskets
1/2 a box of uncooked angel hair pasta
4 cups of favorite spaghetti sauce
2 cans refrigerated crescent rolls
2 to 3 tablespoons butter
Garlic powder
Mozzarella cheese


Preheat oven to 350. 

Cook pasta according to package directions, drain and mix with sauce. 

Meanwhile, lightly grease large muffin pan/pans. 12 muffin spaces total. Divide crescent rolls into triangles and press into muffin pans to form baskets. Use extra dough to fill in the holes and build up the sides. 

Melt butter and mix with a few dashes of garlic powder. Brush butter on the sides of crescents using a pastry or bbq brush. 

Place a square of mozzarella or a tablespoon of shredded mozzarella on the bottom of each crescent. Place a 1/2 cup to 1 cup of spaghetti in each basket and top with more cheese. 

Bake at 350 for 20 minutes. Let cool 5 minutes before removing from pan. 


Dig in!!


Friday, October 11, 2013

Gooey Apple Butter Cake

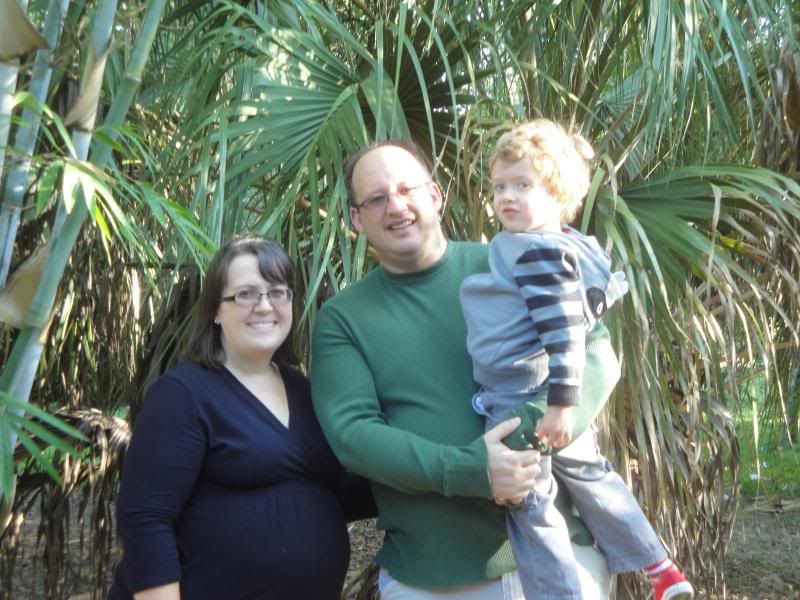
This has been a busy week in our house. Cooper started a preschool speech therapy and he is LOVING it. He goes 2 days a week for just 2 hours, but it's perfect for him right now. I didn't feel like he was ready to start a 5 day preschool program so we decided to put it off one more year (he'll be 4 in January).

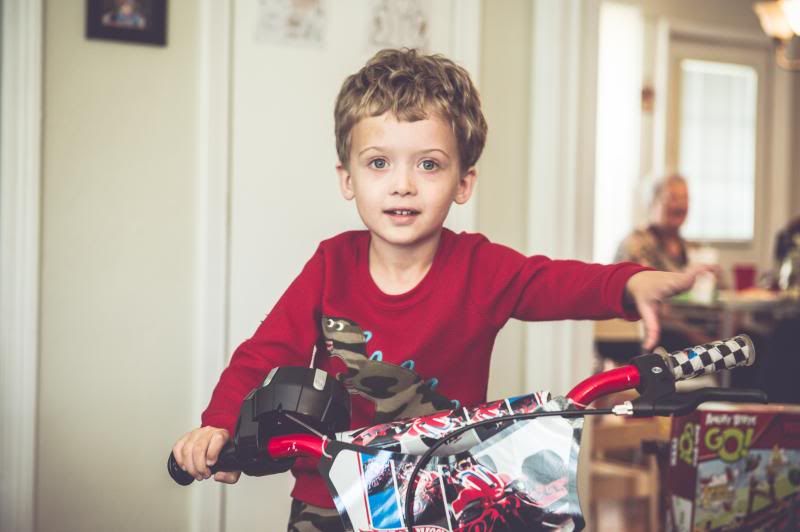
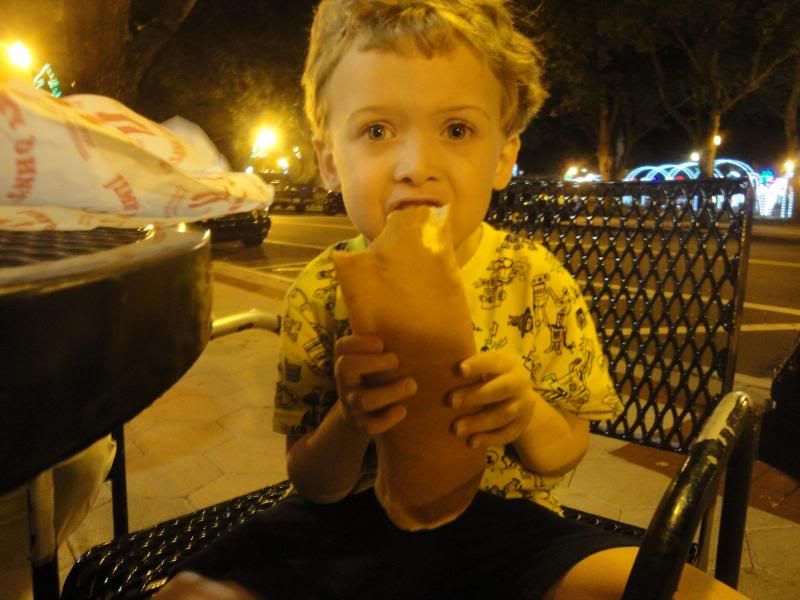
He makes this face for 99 percent of pictures now...


He's also developed an attitude, that's been real fun. REAL FUN. His favorite phrases include 'What did you say?' and 'You can't talk to me' when he's being told something he doesn't want to hear...like it's time to put your toys away or it's bedtime. Ug. I know he's just learning independence, but it's no fun for me! I know this to will pass, just pass quickly...

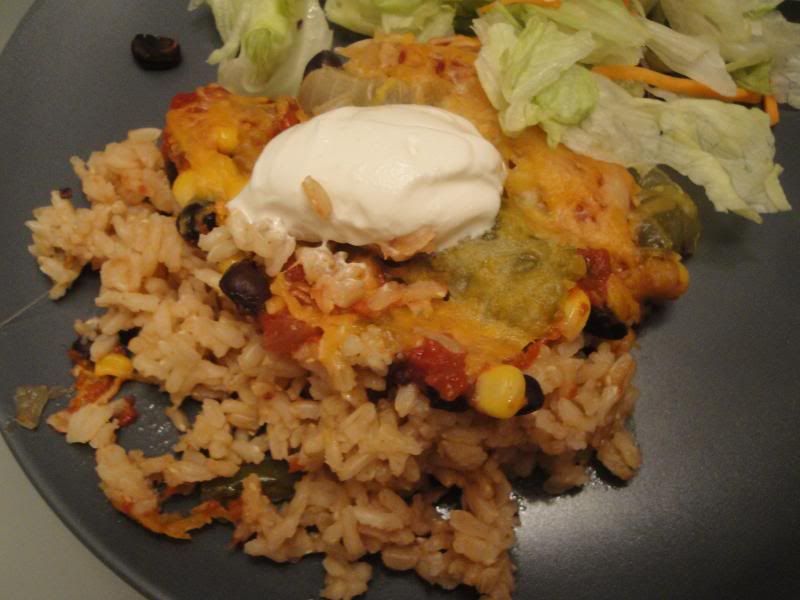
My birthday was on the 9th. I had a good day. Cooper slept in, we went to lunch with my grandma, we had nachos for dinner and Kevin gave Cooper a bath! Giving him a bath is one of my least favorite parenting tasks.

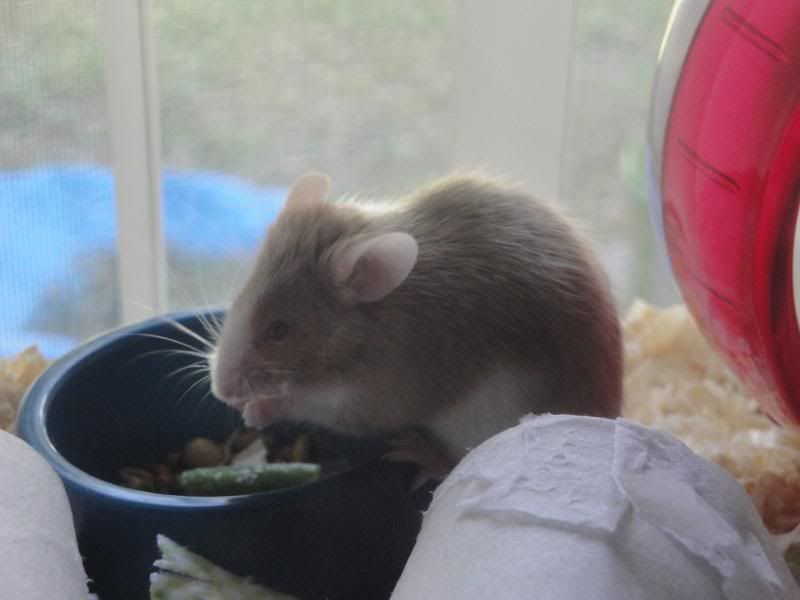
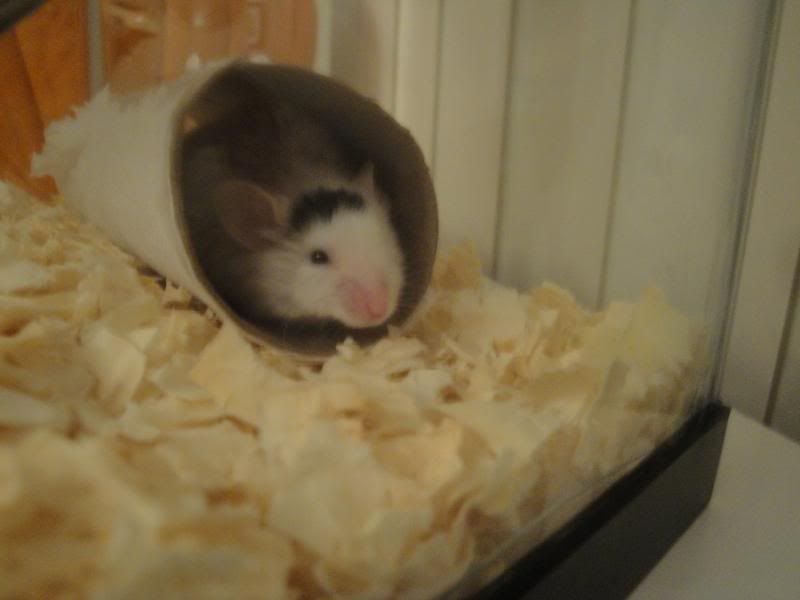
We also got a new pet this week, a little girl mouse named Squeak! She's very cute....


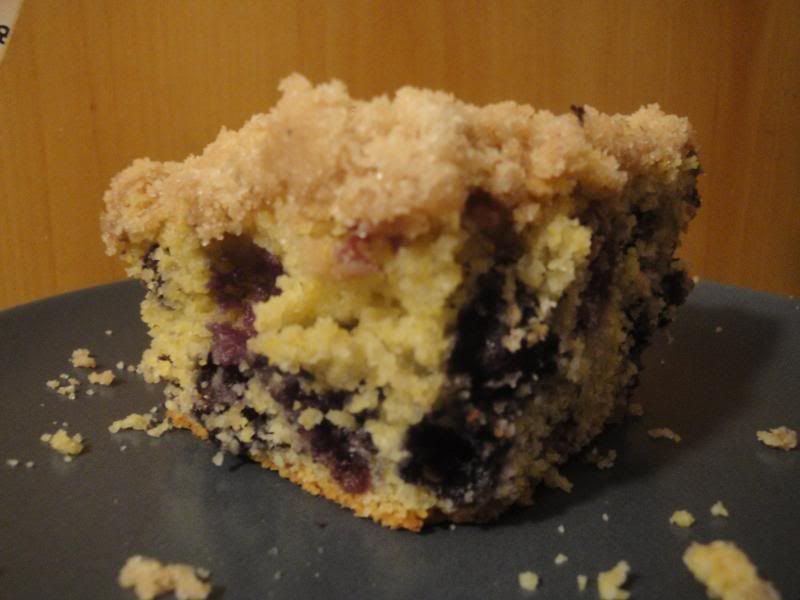
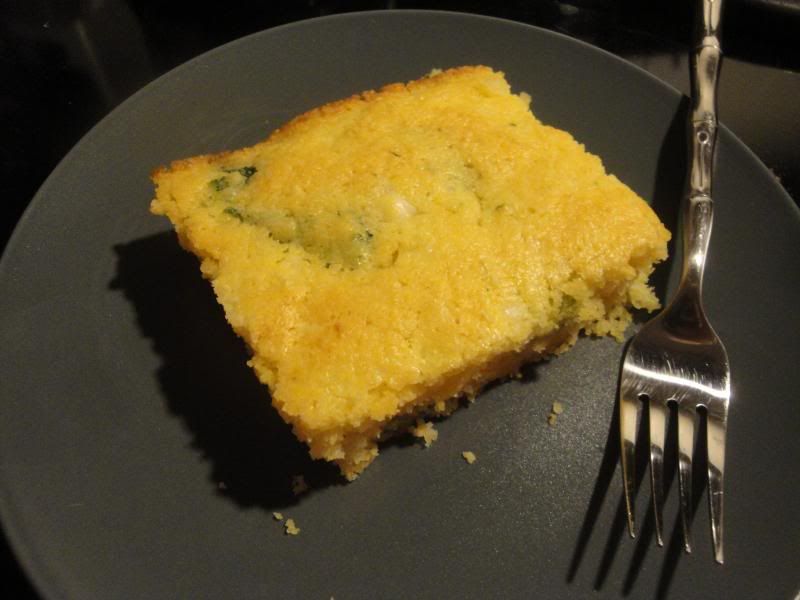
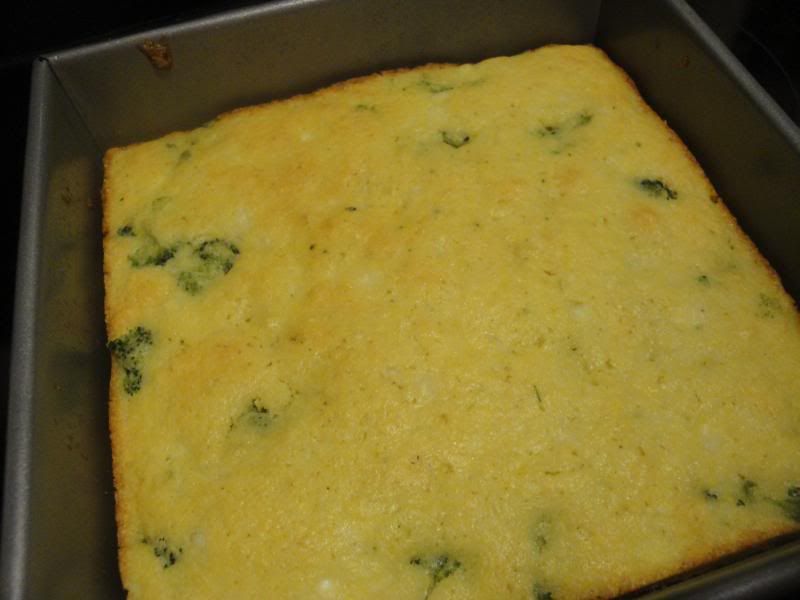
WELL...now onto dessert...

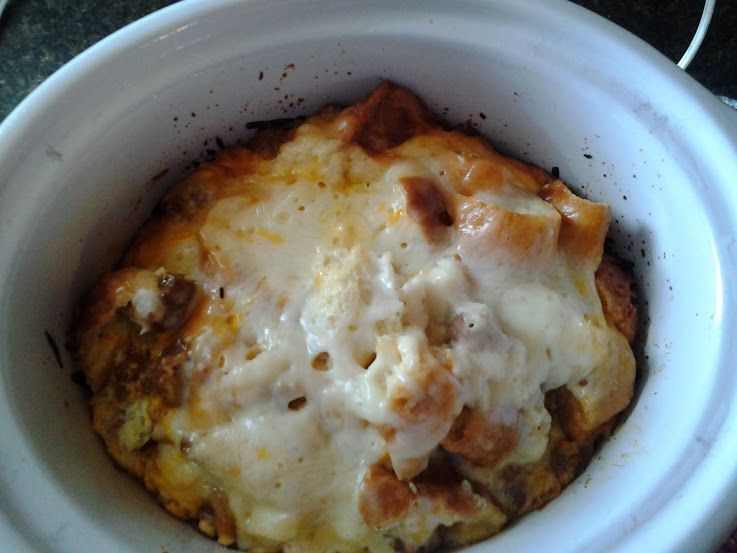
This cake is fantastic and easy. I think most people have heard of or have had Paula Deen's Gooey Butter cake. You basically add a ton of butter and cream cheese to a cake mix and it makes magic in the oven. You can use different flavors of cake mix and add different filings. I usually do a spice cake/pumpkin filling for Thanksgiving, I think I am going to do the one below this year....make it, you will want to share it with your friends and family too!


Gooey Apple Butter Cake

3 medium Granny Smith apples
1 tablespoon fresh lemon juice
1 box cake mix (yellow or butter recipe is best)
1 cup (2 sticks) butter, melted, divided
3 large eggs
8 ozs cream cheese, softened
1 1/2 teaspoons vanilla extract
1 1/2 teaspoons ground cinnamon
3 cups powdered sugar

Preheat oven to 350. Lightly grease two 8 inch rounds or a 9x13 cake pan. 

Peel and chop apples and toss with lemon juice, set aside. 

Mix cake mix, 1/2 cup (1 stick) melted butter, and 1 egg with an electric mixer until well blended and a 'dough' forms. Press into the bottom of cake pan evenly. 

In same bowl, beat cream cheese until fluffy, 30 seconds. Add in rest of melted butter, 2 eggs,  vanilla and cinnamon. Beat at medium for 1 minute, add sugar and mix 1 minute more. 

Fold apple slices with a spatula into cream cheese mixture. Spread evenly into cake pan or pans. Bake for 45 minutes until cake jiggles slightly and slightly solidified in the center. Remember, cake is 'gooey' so you can't do the toothpick in the center thing. 

Let it cool and refrigerate any unused cake for up to a week. 
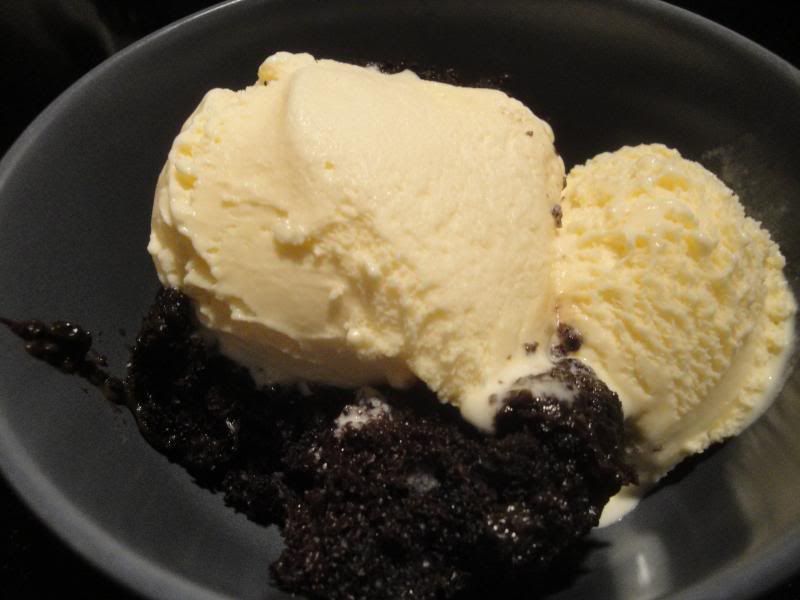
Dig in!


Tuesday, October 1, 2013

Easy Veggie 'Pizza'

Hello 'fall'. The air is slightly cooler and I have been watching The Good Wife almost non-stop for days now. It's my new favorite show.

I currently have Holiday Spice in the wax burner and I am pretending it's 75 degrees outside, instead of the current 84. I cannot wait to open the windows and air out the house. The cat also looks forward to that day, it's as close as I willingly let her get to the outside.


WELL....today I bring you a fun and delicious party food. Or football Sunday food. Or Mommy just really wants to bake some crescent rolls and slap some cream cheese on them.

There are several versions of this floating around the internet. Those versions require you to make a TON of 'pizzas'. This version is enough for a very hungry husband and yourself along with a 3 year old. Or as a dish at a small a get together.

They are versatile, you can switch around the veggies and do different Ranch dip flavors in the cream cheese. I usually stick to traditional Ranch and a combo of carrots, cauliflower and broccoli.


Anyway....here ya go!


Easy Veggie Pizzas

2 cans refrigerated crescent rolls (I prefer Immaculate brand)
Two 16 oz packs of cream cheese, softened
1 tablespoon of dry Ranch dip mix
2 - 3 cups of veggies or cheese for garnish (broccoli, carrots, cauliflower, and bell peppers all work well), chopped


Preheat oven to 350 and lightly spray a cooking sheet with Pam or other cooking spray. 

Unroll crescent rolls and divide into rectangles, do not divide into triangles. Bake for 10 - 15 minutes, checking after 10. They'll be golden brown when ready. 

Meanwhile, mix cream cheese and Ranch mix. Using an electric mixer works best. 

Cool crescent rectangles for 10 minutes then spread cream cheese mixture liberally over the rectangles. Top with veggies and press slightly to help keep them from falling off when picked up. Cut into smaller pieces, if desired. 

Dig in!!


Sunday, September 22, 2013

Broccoli Cornbread Casserole

Happy first day of fall! I wish Florida would listen and cool down, it's still so hot here!

We hired someone to do our yard work this week, and our yard looks AMAZING. Kevin usually mows it, but we don't have a weed eater and our weeds were out of control! I was pretty good at keeping it up last summer, but this pregnancy has kept me from my usual yard work.

Kevin cut down his first tree today. We have a problem with Mulberry tress in our yard and they can take over before you know it. We had a really big one we had to try to take care of ourselves before it got any bigger, it was very close to growing into our cable line. BUT, Kevin did it! Woot!


Our Rain Tree has started turning yellow...it's pretty but I do not look forward to the next few months. It drops these tiny yellow flowers all over the place only to be drug in on shoes all over the house. Next, it will produce pink seed pods that start falling. This attracts these annoying black bugs that like to eat them and they reproduce in the thousands. They will start in the next few weeks and go on until at least Christmas. They come in our house to die. We find them all over the place. I don't look forward to fishing them out of a baby's mouth next fall. YUCK! Anyway..hopefully we can take the tree down by next summer. 

This is a view of the tree from the back of our house...


This is Cooper imitating the face I make when I see the tree now...


Ug ug ug...stupid tree. 

ANYWAY! The evening became better because I made, along with the help of my little chef, Cooper...an awesome broccoli cornbread casserole for dinner! SUPER easy and you possibly have all of the ingredients in your pantry/fridge/freezer already...


Broccoli Cornbread Casserole

2 boxes of Jiffy Mix corn muffin mix
1 1/2 cups small curd cottage cheese
3 cups cooked broccoli florets (I used frozen and thawed them in the microwave)
3/4 cups (1 1/2 stick) unsalted butter, melted
3 large eggs, lightly beaten
1/4 teaspoon salt

Preheat oven to 350 and spray a 9x13 casserole dish with cooking spray. (I used two 8x8 square pans)

Combine all ingredients in a bowl and pour into casserole dish. Bake for 30 minutes until golden brown and set. 


Dig in!


Monday, September 16, 2013

Baking Yellow Rice

I have a confessions: I can't cook yellow rice to save my life. I use my rice cooker for brown and jasmine rice with no problem but it doesn't cook yellow rice for some reason. SO I try it on the stove..the bottom gets mushy while the top is still crunchy. I've tried about 5 times to cook it on the stove with no success. I LOVE yellow rice, so this is very frustrating to me. It's sort of a 'staple' in our house for a quick lunch..yellow rice with black eyed peas is a pretty regular occurrence around here. Yum!

A couple of weeks ago, I tried something new....baking the yellow rice. It was the magic trick that worked. Now we have perfect yellow rice all of the time.

You have to allow for more time in your planning when baking it, it takes about an hour. It's worth it!


All you need to do is preheat your oven to 350 and lightly spray your baking dish with Pam or whatever non-stick cooking spray you so desire. 

After that you measure out 1 part rice to 2 parts water. SOO...if you have 2 cups of rice, you need 4 cups of water. Or 1 cup of rice, 2 cups o water. The prepacked packs of rice aren't usually an even cup amount so a little bit of 'thinking' may be required...:) 

Combine it all in your baking dish and stir a bit to combine. I used the 10oz bag of Vigo and put it in a 9x9 square baking dish. Also my brownie pan...


Cover it with foil and make sure you press it down well around all of the edges. Bake it for 1 hour! That's it! Try it, so easy...and the rice comes out perfectly even and moist. 


Dig in!!


Friday, August 16, 2013

Greek-Style Stew over Couscous

What? A new post? YEP!

I am feeling better most days now...baby is giving mommy a bit of a rest.

I've been in the mood to cook real meals...and not just something frozen. We are sitting as a family at the table again, I didn't realize how much I missed that! Cooper has started getting stubborn with his eating and I am convinced it's because we haven't been sitting at the table. We'll see how he starts doing now.

The first recipe I tried that was blog worthy was this Greek-style stew. It was good and very good for us! It's also super quick, 10-15 minutes. We had ours over plain couscous but it could be served over rice or orzo.

Anyway...hope you enjoy it!

And yes...it's in a paper bowl...I didn't think about that until after we ate. Oh pregnancy brain.


Greek-Style Stew over Couscous

2 cans chickpeas, rinsed and drained
1 can diced tomatoes with onions and garlic
1 cup water
1/8 tsp or more to taste cayenne pepper
1 bag baby fresh baby spinach
2 cups cooked couscous
feta cheese


Combine chickpeas, tomatoes, water and cayenne in a pot and bring to a low boil. Pour bag of spinach over the top and cover to wilt. Stir into mixture and continue to heat until spinach is wilted completely and mixture is hot. 

Serve over couscous topped with feta!


Dig in!

Monday, August 12, 2013

Mandy Pie's Sew Cute

Good Monday Afternoon!

I was feeling motivated to this morning so I decided to break out the sewing machine and finish up a few projects for my Etsy shop.

I am small time still....only had about a dozen orders. I was going full force with it until January, and we got busy life got in the way etc. And then the great sickness of this pregnancy hit. Yada yada. So now I'm back. I wanted to share..ok pimp out...a few of my creations with you today...


Thursday, August 8, 2013

Holy Crap on a Cracker and Thugs

So I stopped on by at 6AM to share my new favorite food site with you, cuz momma still doesn't feel like cookin' new things and I also have had a continuous sink full of dishes. Anyway. I had 30 page views yesterday...and I'm not even posting. To me, that's a lot. I am a small blog. Anyway.

I came across this website this morning...it's awesome. I love it. You'll love it. It seems to be vegetarian. If the cuss words offend you, stay away. :)

http://thugkitchen.com

Saturday, August 3, 2013

Big News...

I know I have been absent for a very long time. Well...there's a reason...


I know it's not the best picture...but you get what's happening. :)

That's our new baby! Due late January 2014! This pregnancy has been SUPER rough. I've been really sick. I am in my 2nd trimester and I am still experiencing crazy nausea so the thought of looking at food and taking pictures of it and blogging about food or pinteresting food...isn't fun. I've been living off of potatoes or whatever else sounds ok at that moment. OH it's not fun. I am hoping it goes away soon. The doctor gave me a couple of prescriptions to try to help, but it's hit or miss. :(

And gardening has even been out of the question....and it doesn't even matter anyway, the raccoon's keep eating everything that grows! About 10 tomatoes, an eggplant an who knows what else..sigh. 


Anyway, I am hoping to be back soon! I'm still getting a lot of page views, so welcome! I hope you enjoy what's here!

Until next time....

Thursday, June 6, 2013

Andrea

We currently have a tropical storm over us. Her name is Andrea. She's really raining down. My poor boy is so stir crazy. It's been rainy all week so he's had NO outside time. Bless his little energetic bored heart.

We do have some tornado watches going on and some possible lightning later today. OH..and the flooding. We live on the down side of our street so all of the rain runs into our yard...but LUCKILY..we have excellent drainage in our 1950's neighborhood. We have a drainage canal behind our house and really does it's job. It's full right now and rushing like a heavy river. Where's my raft...?


Friday, May 31, 2013

Tex-Mex Quinoa and Shrimp Salad

My little container garden has grown since the last time I shared pictures. There are now 5 or 6 tomato plants, 2 bell pepper, a zucchini, eggplant and several herbs.


These pictures were taken last week and everything is twice the size now. We've had a lot of rain lately and I am sure that's helped!


Now onto today's recipe...

This was SO good. SO SO good. 

The most 'complicated' part to me was precooking and chilling the quinoa. It took forever to chill the quinoa..we were hungry. 


Tex-Mex Quinoa Shrimp Salad

Dressing:
1 clove garlic, minced
1/2 teaspoon salt
1/4 teaspoon black pepper
1/3 cup sour cream
3 tablespoons fresh lime juice
2 tablespoons white wine vinegar
1 tablespoon honey
1/3 cup extra virgin olive oil

Salad:
1 tomato, chopped and seeded
1 1/2 cups (1 can) cooked black beans, drained and rinsed if canned
2 cups cooked and cooled quinoa
1 cup frozen corn kernels, thawed
1/4 cup crumbled feta
1/4 cup shredded fiesta style cheese
2 Haas avocados, diced
1/2 pound peeled, deveined and cooked shrimp (I sauteed mine in live oil and little bit of Cajun seasoning)

Whisk together garlic, salt, pepper, sour cream, lime juice, vinegar and honey. Now whisk in olive oil until well incorporated. 

In a large bowl, combine tomato, beans, quinoa, corn, feta, shredded cheese and shrimp. Mix in dressing and chill for 2 hours. Before serving, mix in diced avocados. 


Dig in!!

PS...this makes A LOT!